
The Unexpected Pearfection of a Simple Dessert
There’s a particular magic in a simple pear. Unlike the dramatic rise of a chocolate soufflé or the architectural rigor of a layered cake, the baked pear whispers. It’s the dessert your grandmother might have made on a crisp autumn Tuesday, not to impress, but as a quiet act of love. I first understood this magic on a rain-lashed evening in the Dordogne, where a farmer’s wife served us pears poached in wine, fragrant with star anise. The fruit had surrendered its firmness to become something else entirely—a velvet spoonful of sweetness, with a subtle, haunting spice. That memory is the bedrock of this recipe, which takes the humble pear and elevates it with a crunchy, buttery oat crumble and a cool tang of maple yogurt. It’s a dessert that proves the most profound pleasures are often the simplest.
Why This Recipe Works
This isn’t just a collection of ingredients thrown together. Three key techniques ensure perfect results every time: the pre-baking of the pears, the cold butter technique, and the strategic use of cornstarch.
First, pears are notoriously tricky. They can turn to mush in an instant or remain stubbornly hard. By partially baking the pears alone for 5 minutes before adding the topping, we jump-start their cooking process, ensuring the pear flesh becomes tender but not waterlogged. They begin to release their juices, which later mingle with the crumble to create a natural syrup.
Second, the crumble’s texture relies on cold butter cut into the flour mixture. This technique, used in the best scone and pie dough recipes, creates small, irregular pockets of fat. As the butter melts in the oven, steam pushes through these pockets, creating airy, flaky clusters. If your butter is warm, you’ll get a dense, pasty crust.
Finally, a touch of cornstarch in the crumble is a pro move. It absorbs the pear’s juices as they bubble up, creating a luscious, thick sauce around the fruit rather than a watery pool. The result: a dessert that’s unequivocally saucy, never soggy.
Ingredient Deep Dive
- Pears (Bosc, Anjou, or Bartlett): Bosc pears are my top choice. Their dense flesh holds up perfectly to baking, and their spicy-sweet flavor deepens beautifully. Anjou pears are a great second option, while Bartletts can become very sweet and soft, so watch the cook time. The pear’s natural pectin helps thicken the juices.
- Rolled Oats: Use old-fashioned rolled oats, not quick oats. Rolled oats provide a hearty, chewy texture that contrasts with the soft pear. Quick oats will turn into mealy mush. The oats also absorb some of the buttery syrup, creating those irresistible caramelized edges.
- All-Purpose Flour: Provides structure to the crumble. Gluten-free all-purpose blends work well here too. The flour also helps to stabilize the buttery fat and create the crumbly texture.
- Cold Unsalted Butter: The soul of the crumble. Cold butter creates steam during baking, which lifts the topping and makes it airy. Salted butter can be used, but reduce the added salt by half. The butter’s milk solids also help create that golden-brown color.
- Maple Syrup: Pure maple syrup (Grade A, dark amber) is non-negotiable. The complex, woodsy sweetness is integral to the yogurt and the crumble. Avoid pancake syrup, which is corn syrup-based and will result in an artificial, cloying sweetness.
- Greek Yogurt: A full-fat, thick Greek yogurt is the perfect tangy counterpoint to the sweet pears and buttery crumble. It also adds a creamy richness that balances the dish.
- Lemon Juice & Zest: The acidity in lemon has a dual purpose. It prevents the pears from oxidizing (turning brown) and brightens the overall flavor profile, cutting through the richness.
- Brown Sugar & Cinnamon: Brown sugar adds a deeper molasses note compared to white sugar, while cinnamon complements the pear’s natural flavors. Feel free to add a pinch of cardamom or ginger for extra warmth.
Masterclass Instructions
Phase 1: Prep the Pears (10 minutes)
Preheat your oven to 375°F (190°C). Select 4 firm but ripe pears. Halve them lengthwise and use a melon baller or teaspoon to scoop out the core and seeds, creating a neat little cavity. Don’t peel them—the skin holds the fruit together during baking and becomes wonderfully tender. Brush the cut surfaces with a mixture of 1 tablespoon lemon juice and 1 teaspoon water to prevent browning. Place the pear halves, cut-side up, in a baking dish just large enough to hold them snugly. This is important: a snug fit concentrates the juices.
Phase 2: Make the Crumble (5 minutes)
In a medium bowl, combine ½ cup rolled oats, ¼ cup all-purpose flour, ¼ cup packed brown sugar, ½ teaspoon cinnamon, ¼ teaspoon salt, and 1 teaspoon cornstarch. Whisk together. Add 3 tablespoons cold unsalted butter, cut into ½-inch cubes. Use your fingertips (the quickest way to warm up butter? Not your palms) or a pastry blender to rub the butter into the flour mixture until it resembles coarse meal with some pea-sized butter pieces. This is the texture you want: irregular, not a uniform paste.
Phase 3: First Bake – The Pre-Cook (5 minutes)
Place the pears in the oven and bake for exactly 5 minutes. This gives them a head start. While they bake, prepare the maple yogurt: whisk ½ cup Greek yogurt with 2 tablespoons pure maple syrup until smooth. Set aside in the fridge.
Phase 4: Crumble Topping & Second Bake (20-25 minutes)
Carefully remove the pears from the oven. They should look slightly translucent around the edges. Spoon the crumble mixture evenly into the cavity of each pear half and on top, pressing gently. Don’t worry if some falls off onto the dish—it will caramelize beautifully. Drizzle a tiny bit of any remaining lemon juice mixture over the top. Return the dish to the oven and bake until the pears are tender when pierced with a knife, the crumble is golden brown, and the juices are bubbling, about 20-25 minutes. If the topping browns too quickly, tent loosely with foil for the last 10 minutes.
Phase 5: Rest & Serve (5 minutes)
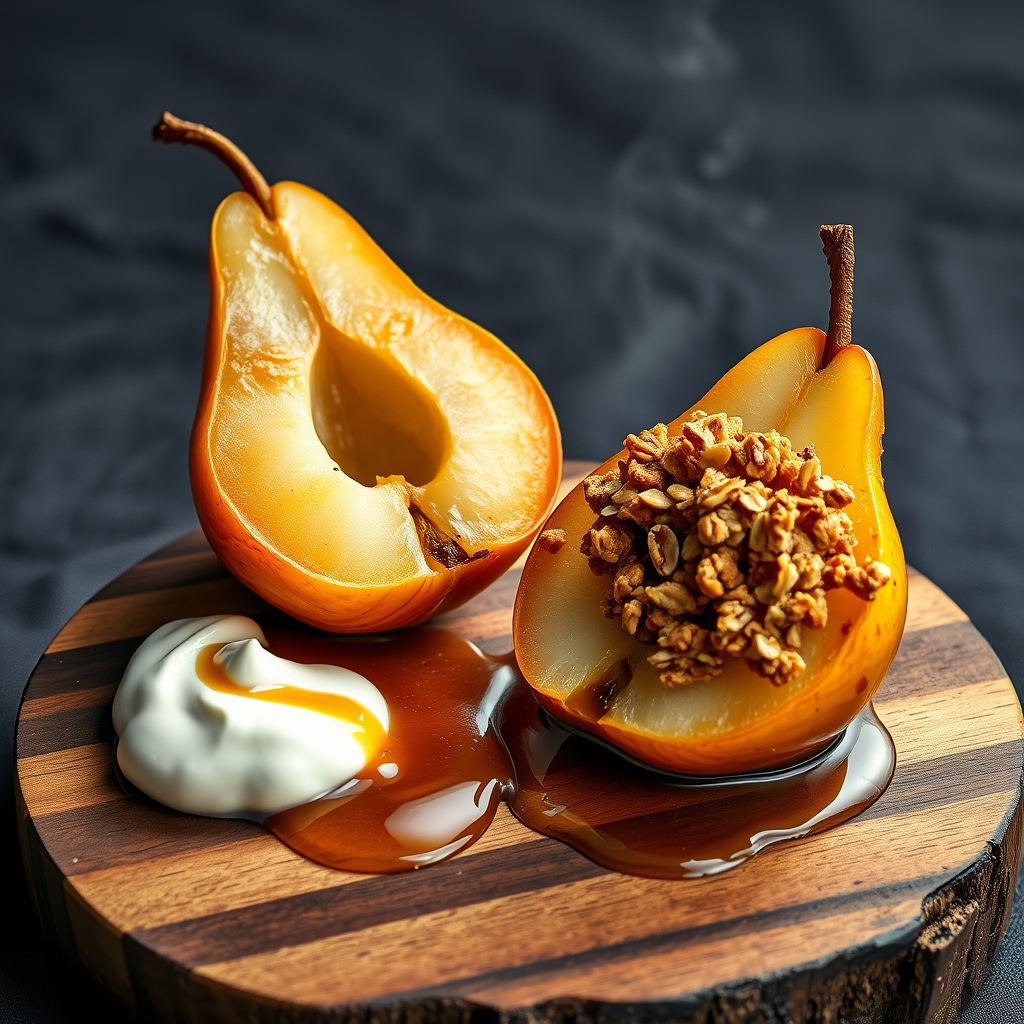
Let the pears rest in the pan for 5 minutes. This allows the juices to thicken slightly. During this time, they will continue to cook gently from carryover heat. Serve warm: place two pear halves on each plate, drizzle with a generous spoonful of the pan syrup, and add a dollop of maple yogurt on the side. The contrast of warm, spiced pears and cool, tangy yogurt is pure alchemy.
Troubleshooting & FAQ
Can I make this ahead of time?
Yes. You can bake the pears, cool them completely, and refrigerate for up to 2 days. To reheat, cover with foil and warm in a 300°F oven for 10-15 minutes. The crumble will lose some crunch, but it’s still delicious. Make the yogurt fresh just before serving for the best texture.
Can I freeze the baked pears?
Yes. Assemble and bake the pears, let cool completely, then transfer to an airtight freezer container. Freeze for up to 3 months. Thaw overnight in the fridge and reheat as above. The crumble texture will soften, but the flavor remains excellent.
My pears are too soft/too hard after baking. What went wrong?
Pears vary greatly in ripeness. Use pears that yield slightly to gentle pressure near the stem. For overly firm pears, increase the initial pre-bake by 3-5 minutes. For softer, very ripe pears, reduce the second bake by 5 minutes and check early with a skewer.
How do I make a larger batch?
Simply scale the ingredients proportionally. For 6 pears (12 halves), use 1.5 times the crumble and yogurt amounts. Use a larger baking dish so the pears are not crowded.
My crumble turned into a paste. How to fix?
This usually happens if the butter was too warm. The mixture should look like coarse sand with some bigger bits. If it clumps together in a dough, refrigerate for 10 minutes until firm, then break it up with a fork. Next time, chill the butter and flour mixture before cutting in.
Leftover maple syrup? Whisk it into unsalted butter for an incredible compound butter for pancakes or roasted vegetables.